Add Classic System Icons to the Desktop
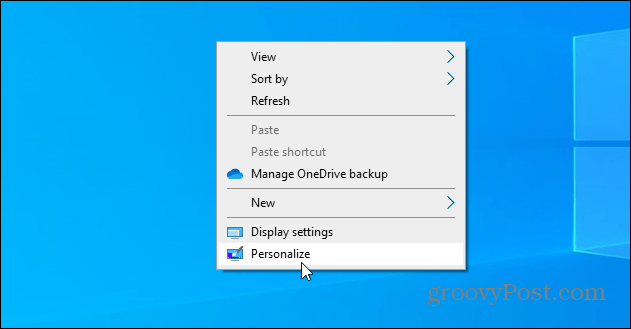
To get the icons on your desktop, right-click an empty area of your desktop and click Personalize from the menu.
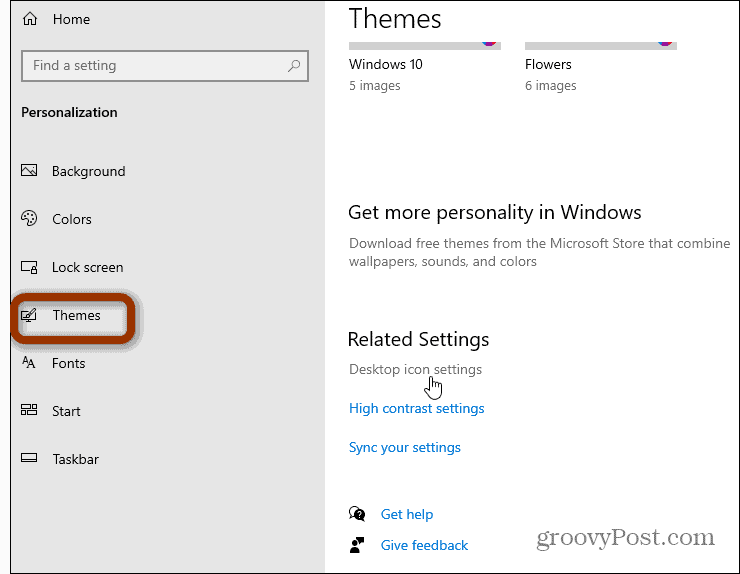
That will open the Settings app to the “Personalization” section. From there, click on Themes on the left-hand side. Scroll down on the right section and click the “Desktop icon settings” link under the “Related Settings” section near the bottom.
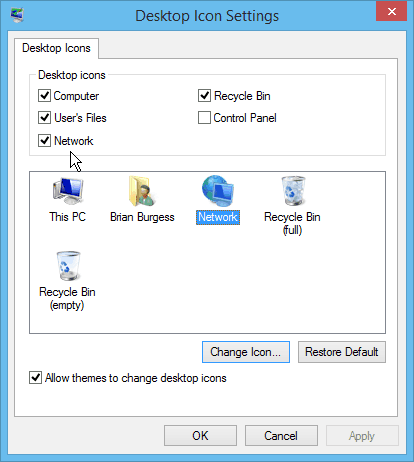
There you go. That brings up the Desktop Icon Settings screen, where you can choose the ones you want to display. Note that it also includes the classic Control Panel icon if you want an easy way to reach that. Just check the icons you want on your desktop and click OK.
Keep in mind that Microsoft is moving more and more classic Control Panel items into the Settings app. After a few years, there might not be a Control Panel to access from Windows 10 anymore. Everything will be in Settings. For example, starting with Windows 10 20H2, the classic System properties page is now in Settings. But you can still access the System page by creating a shortcut.
Older Versions of Windows
If you’re not on Windows 10 yet and are still running an older version of Windows, you can do the same. Right-click an empty area on the desktop and select Personalize. Then in the Control Panel screen that opens, select Change desktop icons.
Then you will get the same Desktop Icon Settings screen where you can check the ones you want.
If you want to remove an icon, follow the same process, and when you get to the Desktop Icon Settings window, uncheck what you don’t want and click OK. Comment Name * Email *
Δ Save my name and email and send me emails as new comments are made to this post.
![]()


![]()


