Although the tool has been around since the days of Windows Vista, I discovered we haven’t talked about it here on groovyPost yet, so I thought I’d take 10 minutes and give you a quick Screenshot Tour showing you where you can find it as well as a few of its features.
The Snipping Tool in Windows 10
Note: The Snipping Tool is also built into Windows 10. You can also get more advanced options for screenshots by using the Snip & Sketch Tool in Windows 10. To access the Snipping to in Windows 10, hit the Windows key and type: snipping tool. Or, you can also find it in the Accessories Folder. It then works virtually identical to what it did on Windows 7.
Windows 7 is No longer Supported
Microsoft ended support for Windows 7, and if you want the latest, greatest, and most secure OS for your PC, install Windows 10.
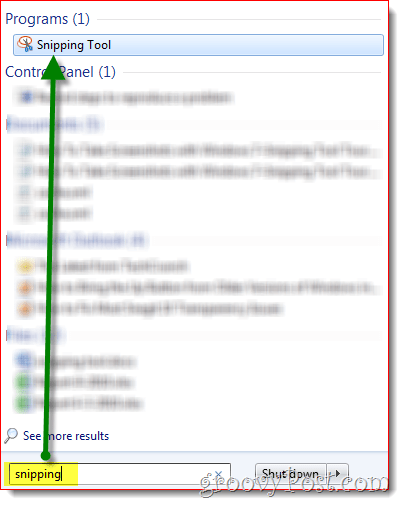
Where is the Windows 7 Snipping Tool?
You can find the Snipping tool by typing Snipping into the Windows 7 Search Box to get started.
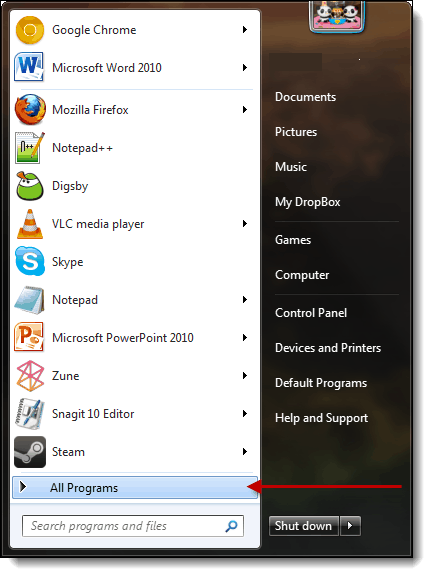
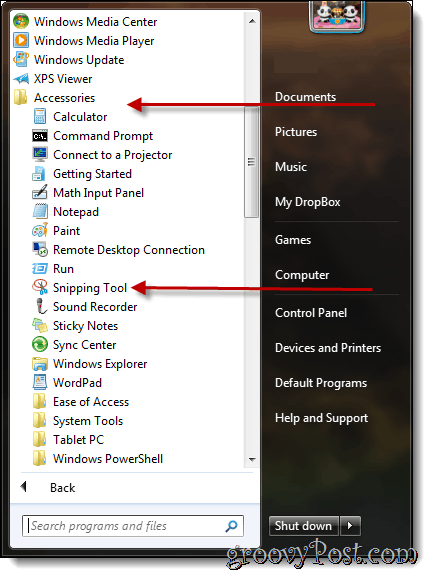
Alternatively, you can also find it the old-fashioned way in the Start > All Programs menu.
Next, expand the Accessories Folder, and then click Snipping Tool.
Snipping Tool Features
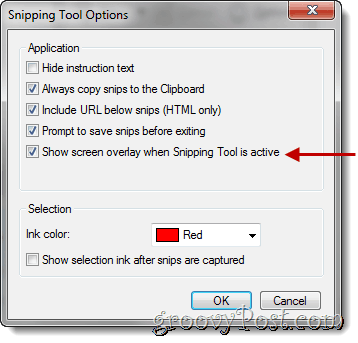
If you click Options, you can change the way that the snips are taken. For example, the option to “show screen overlay” may be selected as an opaque layer covering your display until you take a snippet. Also, the color of the outlines may be changed to outline the area of the screenshot to make the area more visible.
To create a snip of a particular section on your computer, click the down arrow next to the New button. Four different options are available: Free-form Snip, Rectangular Snip, Window Snip, and Full-Screen Snip.
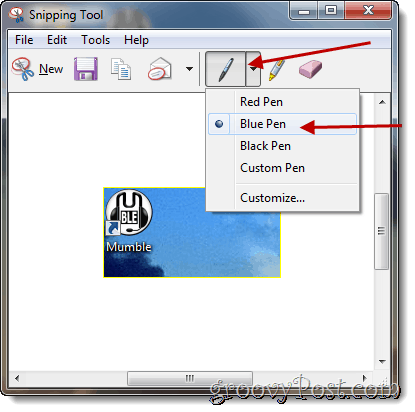
Pen Tool
The Snipping Tool has Pen features which you can use to draw on the SNIP / Screenshot you just took. The Pens come in a variety of colors which you can customize by clicking the customize button. There you can customize the Pen TIP type, line thickness, and color.
Once selected, draw away.
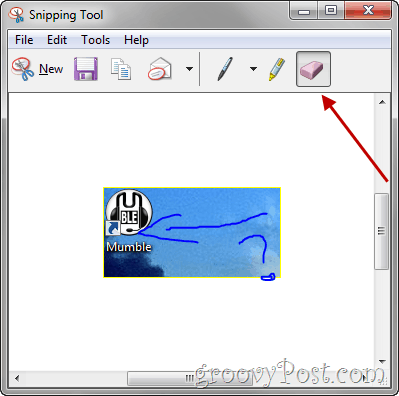
Eraser Tool
The eraser tool is useful if you make a mistake while drawing.
Share your screenshot – snip
If you use Outlook as your mail client, your snip can be sent through email using the Snipping Tool software.
The great thing about this tool is it’s free and straightforward to use once you know it exists. Guest Contributor: Joanna Danek Joanna is a groovyReader turned contributor with love for all things technology. Joanna specifically enjoys writing about Windows 7 and mobile technology, so don’t be surprised to see an article from Joanna pop on the site from time to time. http://www.ducklink.com/p/free-screen-capture-tool/ Enjoy… Comment Name * Email *
Δ Save my name and email and send me emails as new comments are made to this post.


![]()
