How It Works
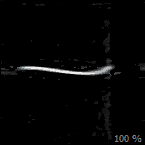
In a perfect world, any kind of motion blur would be would be one-directional and constant. However, in real life, things are a bit different. The path of the motion blur depends greatly on the focal length, shutter speed, hand movement, and subject movement during the shot. What this means is that Photoshop’s job is to analyze the photo and try to determine this motion blur path in order to try and compensate for it. What you can see below is an example of what a motion blur path may look like. Notice how aside from the thick white line there are also some small artefact-like sprites in the background, which may indicate any additional motion or shake detected by Photoshop.
Since removing the blur uses a sophisticated method of “re-stacking” the image back together, it’s normal to expect artefacts and imperfections in the final rendered image. Here’s an example of how heavy motion blur compensation can introduce other problems in an image:
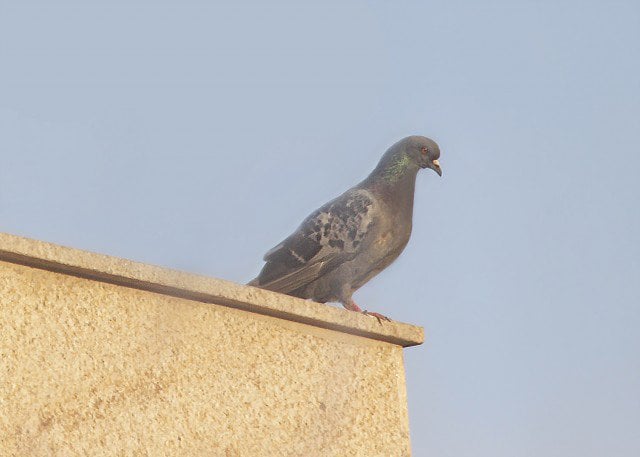
Minor Blur
We’ll start off easy. Here’s a photo of a pigeon I took that ended up being a bit blurred.
You can see that due to the blur, the image seems low on details, despite being taken with a DSLR camera. I used Photoshop’s Shake Reduction feature and manually tweaked the sliders to my preference. Let’s have a look at a Before and After:
A significant improvement! Perhaps the areas where this is most noticeable are the wings and the eye of the pigeon. Although Photoshop did a good job here it’s hard to say we have a usable image, plenty of artifacts were introduced. The shake reduction further sharpened the out of focus element in the foreground, which in this case, was a dirty window. Luckily this isn’t something too disturbing — here’s another before and after of how I managed to fix the image using only brushes, adjustments, selections and filters:
And finally, let’s have a direct comparison between the original image and the final image:
It’s more than obvious that the results are outstanding. A small amount of blur is apparently no problem for Photoshop. On the next page, we’ll try something a bit more difficult.
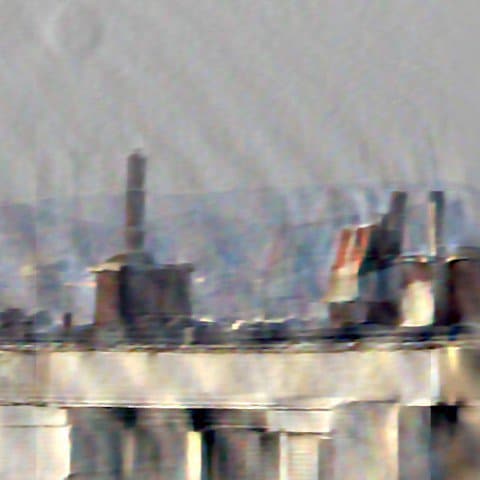
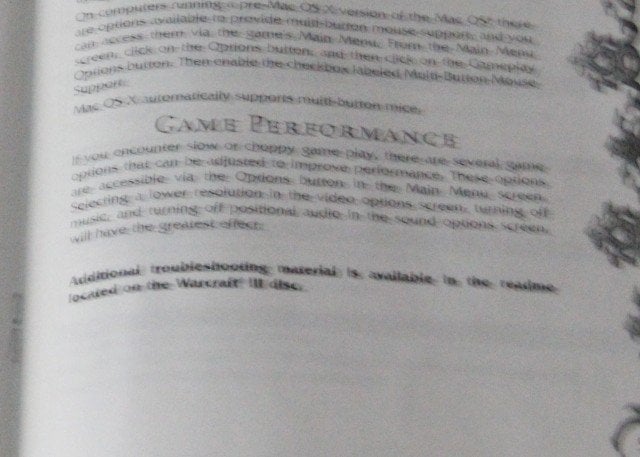
Medium Blur
You’ve probably been in a situation where you don’t feel like carrying around any paper documents, so you just take a picture of the document you need and you’re all set. Or are you? Poor lighting conditions indoors often lead to blurry images which can be rather hard to read.
Let’s see if Photoshop can help. Again, I used Shake Reduction, this time I manually defined 3 Blur Trace regions in order to help compensate the slightly curved page of the book, as well as the angle of the photograph.
The results here are slightly disappointing. Although the text is significantly sharper, the readability sees no improvement. In fact, I’d even say the original (blurred) photo is much easier to read, at least when zoomed in properly. Either way, this technique would probably work best on an overhead photo of a flat page, but the point here is to try and push Photoshop to it’s limits. And that’s exactly what we’re doing with our next test.
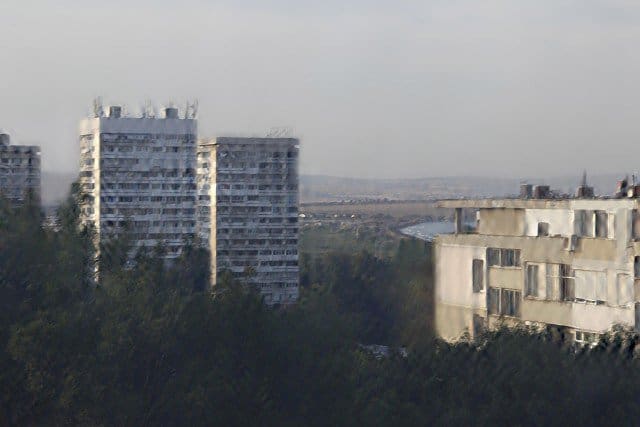
Heavy Blur
A zoomed in photo of a landscape with a lot of handheld motion blur. Could we make this any worse?
I put Photoshop through a really tough test — 5 different Blur Trace regions all on a high-resolution image. Could this actually work?
Ouch! That’s nasty. Although it’s a huge improvement over the original image and a lot of details were restored, the artifacting is simply unbearable. I decided to have an attempt at fixing this manually, just like I did with the photo of the pigeon. I do admit, my edits were rather heavy and some recovered details did get lost again, but the final result is definitely worth it.
Final Verdict
While Photoshop’s Shake Reduction has a long way to go before it can alienate us with near-perfect results, it’s a great step towards exploring the realms of what was once though impossible. Currently the tool works best on minor mistakes and that’s actually a good thing. All in all Photoshop’s primary job is to make good images look better, not bad images look good. Feel free to check out our big selection of Photoshop guides and tutorials. And drop a comment below if you’d like to see a full tutorial on how to use shake reduction like a pro. Comment Name * Email *
Δ Save my name and email and send me emails as new comments are made to this post.


![]()
