Here are a few ways to make your mobile photography even better by using Photoshop and Lightroom:
Create an HDR Panorama
Panoramas taken with phones are great. HDR photos are great, too. So let me ask you – Why not both? Here are the simple steps for making a HDR Panorama:
Take a series of overlapping HDR Photos Load up your camera, set it to HDR mode and take as many overlapping photos as you like.
Upload them to your computer No special instructions needed here. OneDrive, Dropbox, Pushbullet… the list goes on and on. Use whatever you like to get those photos across.
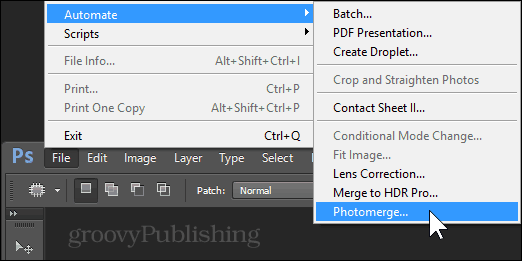
Merging your Panorama To merge, use the Photomerge option of Photoshop found under File > Automate > Photomerge. If you prefer using Adobe Bridge we’ve got you covered.
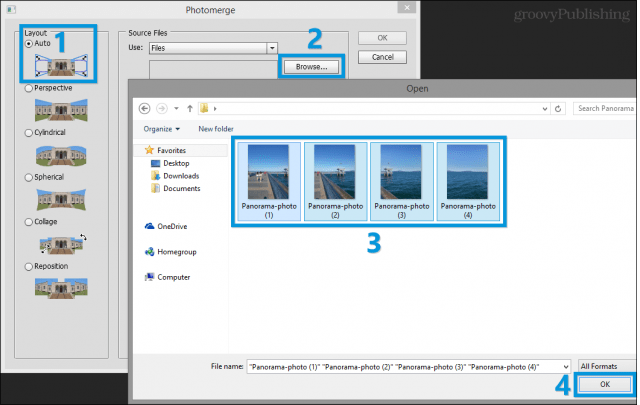
Pick Auto mode and use the Browse button to locate your images.
Now press OK and enjoy the show – Photoshop should align and merge your images in no time. Once it’s done you can save the image in a preferred format. Here is an example:
Improve Dynamic Range
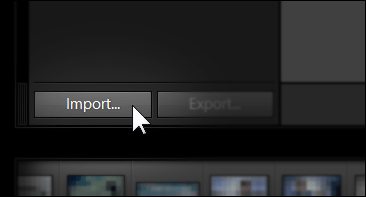
Is it hard to see the cloudy sky in your daytime phone photos? Maybe your friends are all silhouettes when shot against a beautiful sunset? Worry not – we can fix that! 1. Import your photo(s) to Lightroom While in Library view, press the Import button on the lower left to add your new photos.
Pull Back Highlights, Boost Shadows Experiment with the Highlight and Shadow sliders in Develop mode. Don’t pull the sliders all the way to -100 and 100 since most smartphone cameras can’t capture that much dynamic range in the first place.
Export at maximum quality and original size Keep your photo at its best quality by dragging the quality slider all the way to 100 and removing the tick from “Resize to fit”.
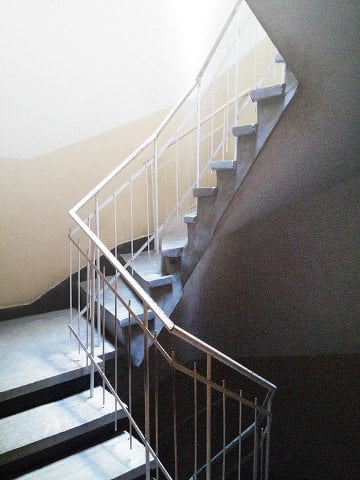
Here’s a quick before/after. Notice how the white glow in the sky is gone and how the details in the shadow areas are completely recovered.
Noise Reduction
Noise – those nasty little things in your photos that remind you of a broken analog TV antenna. Luckily – you can get rid of them! Well, partially, at least. Here’s how: 1. Import your photo(s) to Lightroom Again – use “Import” to get your photos in your library.
2. Use the Details panel to reduce noise While in Develop mode, use noise reduction from the noise panel to give your image a general cleanup.
3. Use the Brush Tool for selective noise reduction You can use the brush tool in Lightroom to selectively reduce noise in darker areas of an image. Below you can find the settings that I use – feel free to experiment with the sliders and tweak the results based on the image you’re working with.
- Export at maximum quality and original size Here’s a comparison of the original image and the one where I reduced the noise:
Clarity Boost / Clarity Reduction
1. Import your photo(s) to Lightroom
Use the Clarity slider You can take advantage of the Clarity slider in Lightroom (or Definition slider in Apple Aperture) to completely change the look of an image.
Export at maximum quality and original size Here’s a comparison between clarity boost (left) and clarity reduction (right):
Add DOF (Bokeh)
This is a neat little trick to make your photos look more professional. Bokeh is the blurry background that appears in images in which only the important elements are in focus. Have a look at our article “Bokeh in your shots without using expensive gear” for a more detailed walkthrough:
For now, these are all the tips I can think of. Remember – Photoshop and Lightroom are the ultimate gateway to creativity. Try different techniques and look at our growing catalog of Photoshop tutorials in case you need a little extra inspiration. Comment Name * Email *
Δ Save my name and email and send me emails as new comments are made to this post.

