A good way to organize larger Word documents is by making a table of contents. You can do this by adding headings and sub-headings to your document. Here’s how to make a table of contents in Word using this method.
Designing a Table of Contents in Word
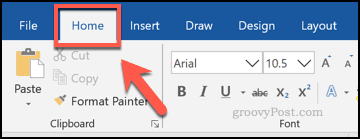
To make a table of contents in Word, you’ll need a document with sufficient text. You can create a table of contents using a single page, of course, but there wouldn’t be much point. If your document is large enough, however, you can make a table of contents in Microsoft Word using heading styles. Word automatically identifies headings for sections using text with heading styles named Heading 1 and ending in Heading 5 applied. In most cases, however, you’ll want to use the Headings 2-4 styles. To do this, select the text for your headings in Word, then click the Home tab on the ribbon bar.
From the Home tab, click one of the Heading style options under the Styles section.
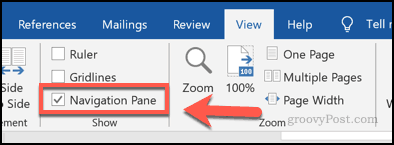
Do this throughout your document to separate it into relevant sections. Heading 1 is usually used for the title of your document while Heading 2 is used for main sections. You can then split up these sections further using Headings 3-5. Once you’ve split up your document using your headings, you can then preview your table of contents. You’ll need to enable the Navigation Pane to view it first. To do this, click the View tab on the ribbon bar. From here, click the checkbox next to the Navigation Pane option in the Show section.
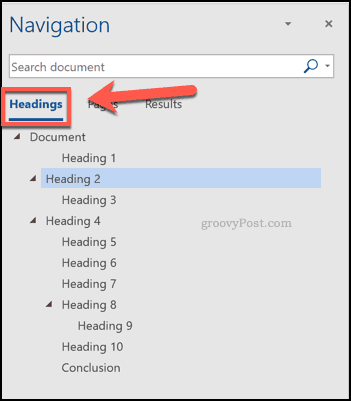
The Navigation Pane will appear on the left, with your organized document split into heading appearing under the Headings tab.
This is only a preview of your table of contents, but it should allow you to configure your headings first before you insert a table of contents into your document directly.
Inserting a Table of Contents in Word
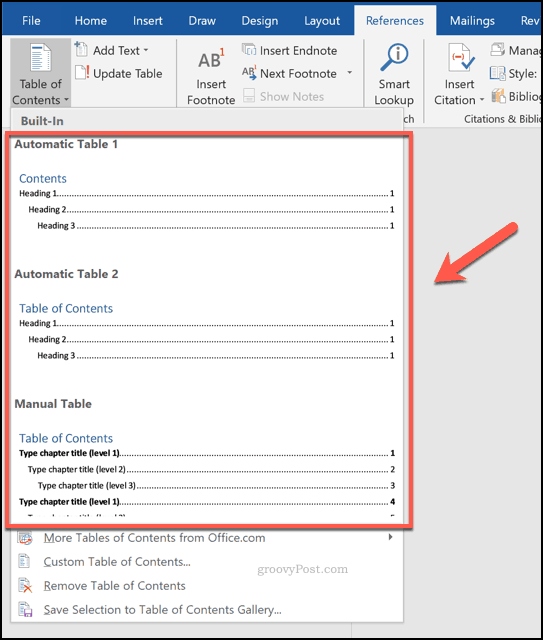
To insert an actual table of contents into your Word document, place your blinking cursor in a suitable position on your document. When you’re ready, click the References tab on the ribbon bar. From there, click the Table of Contents button.
This will bring up various styling options. You can choose one of these styles to create a table of contents which, when selected, will be inserted into the document. Press one of the available options in the drop-down menu to insert a table of contents using that style.
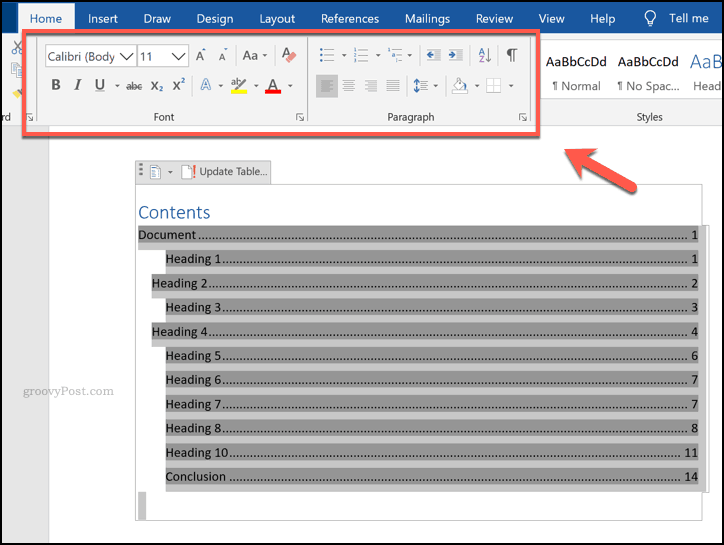
Your table of contents will be inserted into your document at this point. You can alter the style of your table of contents further by selecting the text and using the formatting options under the Home tab on the ribbon bar.
If you make changes to your document and need to update your table of contents afterward, press the References tab on the ribbon bar. From here, click the Update table button in the Table of Contents section.
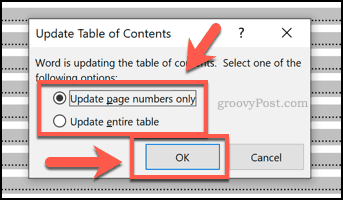
Microsoft Word will ask you whether you want to only update the page numbers and leave the headings intact or update the entire table of contents. Select either of the Update page numbers only or Update entire table options, then press the OK button to update your table.
Creating Larger Word Documents
Adding a table of contents is just one way to create larger word documents without overwhelming the reader. You can start by using building blocks in Word to help format your documents, especially you’re writing in the same style consistently. What are your tips for creating and organizing larger documents in Microsoft Word? Let us know in the comments section.
![]()

