If you have two or three widescreen monitors on your desktop computer, you may find it difficult to get a decent panoramic wallpaper to fit them all. Today we’ll show you a way to stitch your own panoramas with Adobe Bridge and Adobe Photoshop (and a good camera helps also.)
Step 1 – Getting The Photos
Your camera doesn’t need to be anything special. Personally, for this How-To I will use pictures taken with my phone. You can build a panoramic photo using from 2 to 7 images depending on what results you want. For the best results, try to keep the focus and exposure (brightness) in each image approximately the same to achieve the best results. Once you have your photos transferred to your computer you’re ready for Step 2.
Step 2 – Opening Bridge
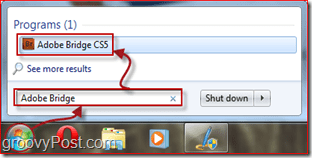
Now it’s time to get started with Bridge. Open the Windows Start Menu, type in Adobe Bridge and Click the icon when it shows up.
Step 3 – Importing The Photos To Photomerge
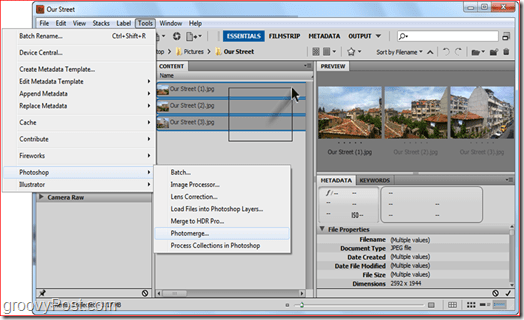
With Adobe Bridge open, go ahead and browse to the location where you put the photos for your panorama. Select them with a click-‘n’-drag or by holding down the Ctrl key and clicking on the images one by one. After you’ve selected the pictures, go to Tools, Photoshop, Photomerge.
Step 4 – Selecting Alignment Method
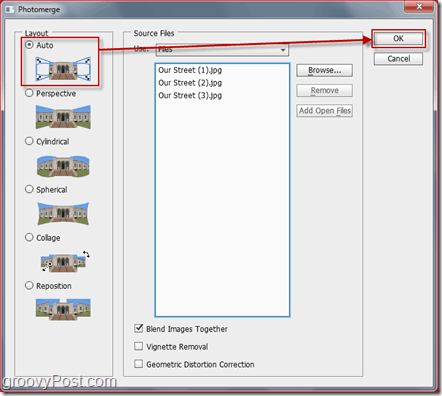
After selecting Photomerge, Photoshop should load and then ask you for an alignment method. It’s best to leave this setting to Auto, but if you feel like experimenting you can always try out the other ones too. In this case, we’ll go for an Auto layout. Make sure Auto is selected on the left side of the window and Click OK. Photoshop will start doing its job. Depending on image size, image complexity and mostly computer speed, this process may take anywhere from 30 seconds to 10 minutes.
Step 5 – Final Adjustments
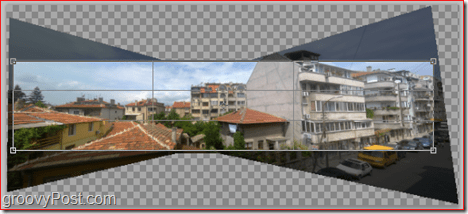
Once your panorama has finished stitching, you may notice that your panorama will look a bit odd. Simply crop the image with the Crop Tool (C), cropping out any blank areas.
Once cropping finishes, press Ctrl+S (or command+S on a Mac) to save your image. Make sure to set the image format to JPEG or PNG. Saving as the default PSD will make it a bit hard for your friends to see your new AWESOME photo unless they have Photoshop!
Done! Congrats, you now know how to make your own panoramas in about ten clicks! Feel free to subscribe to our RSS and “stay tuned” – we’re planning on releasing some more Photoshop Tutorials and Tricks! Comment Name * Email *
Δ Save my name and email and send me emails as new comments are made to this post.


![]()
